Windows: How to Enable GodMode aka “Windows Master Control Panel”
APPLIES TO: Windows 7, Windows 8, Windows 10, Windows 11
FEATURE: Enable “God Mode” also known as “Windows Master Control Panel
SOLUTION:
1. Create a New Folder on the Desktop by right clicking anywhere on the Desktop that does not have an icon.
2. In the dropdown menu left click on New then left click on Folder.
3. A folder icon will be created on the Desktop with the name New Folder. Note: If you click away from the folder it will remain with the name New Folder, right click the “New Folder” and select Rename from the dropdown menu.
4. Type in the name of the new folder exactly as follows:
GodMode.{ED7BA470-8E54-465E-825C-99712043E01C}
Press Enter to confirm the name.
The folder Icon will change to a Control Panel Icon with no name.
When opening the God Mode Control Panel you will see a list of all of options available through this feature. Below is a screen shot showing just a portion of the 201 shortcuts to tools and features in Windows.
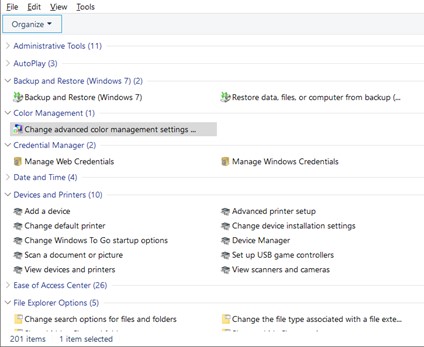
ADDITIONAL INFORMATION: the ability to collapse and expand the categories makes this large list of shortcuts more manageable. Simply right click a category and expand all or collapse all or in the individual categories click on the > to expand or collapse.
This feature is not an actual mode and does not provide and advanced functionality to Windows. It is just a method of organizing Windows settings into one convenient location.
PROPERTIES: Last modified: 5/6/22 Revision: 1.01
Keywords: Godmode, God Mode, Windows Master Control Panel, Windows 7, Windows 8, Windows 10, Windows 11